This tutorial shows you how to execute macros and pauses using only the RUN button in the effects module.
 Sometimes it’s useful to run a macro from the ‘RUN’ button in the effects recall module on the panel. For instance, if you have a macro with several ‘wait’ commands (PAUSE, ZERO), you would usually press the ‘TAKE’ button on the flexipad to continue the macro. Or you might re-press the button to which you’ve attached the macro. That’s fine if you only have one or two macros, but if you need to recall and run dozens of different macros, it may be more convenient to make them all run, and continue after a pause, using only the ‘RUN’ button. This is how to do it, using a macro timeline:
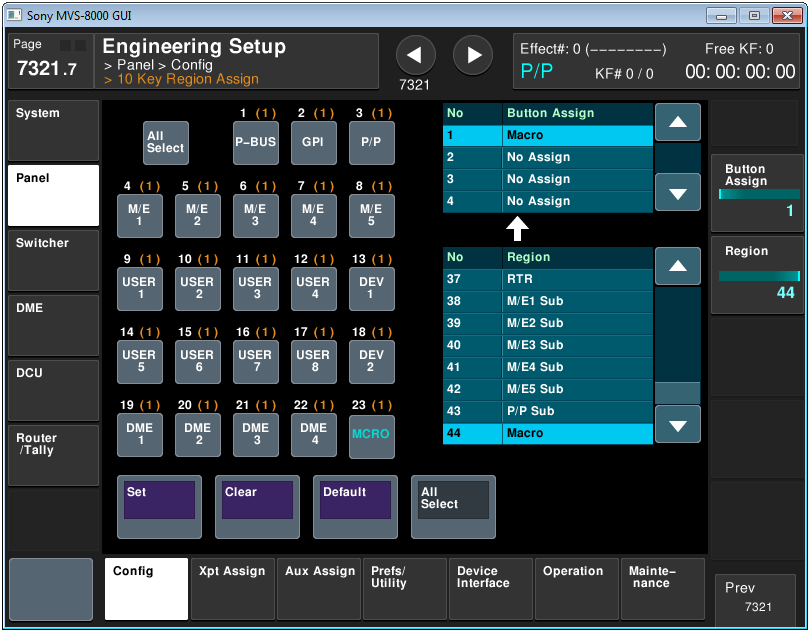 Firstly, you need to create an effect, or timeline, in the MACRO region. Go to menu 7321.7 to assign the MACRO region to a button if it’s not already mapped in the 10 Key Region (aka ‘master keypad’). I’ve used the bottom right button in the screenshot.
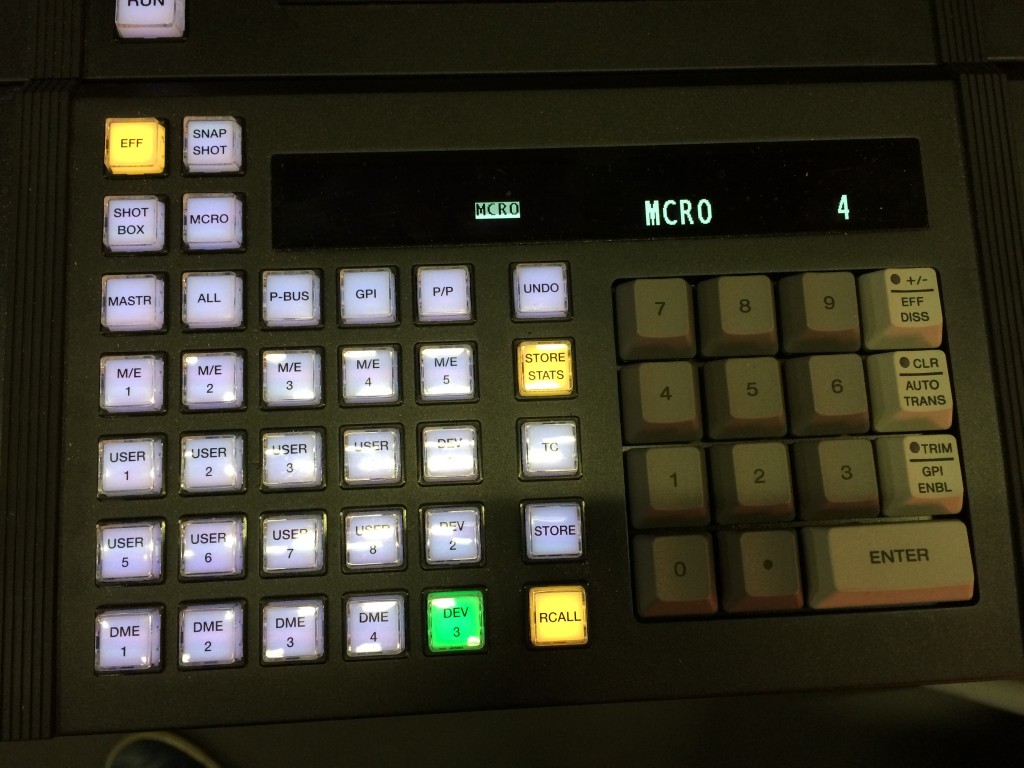
Recall a timeline register by pressing EFF>MCRO>RCL(number)>ENTER. I’ve used EFF #4 in the picture above, because I’m going to be recalling MACRO #4 and I like tidy! Notice that I didn’t change the label in the button, which says DEV3 – but the display correctly identifies the region as MCRO.
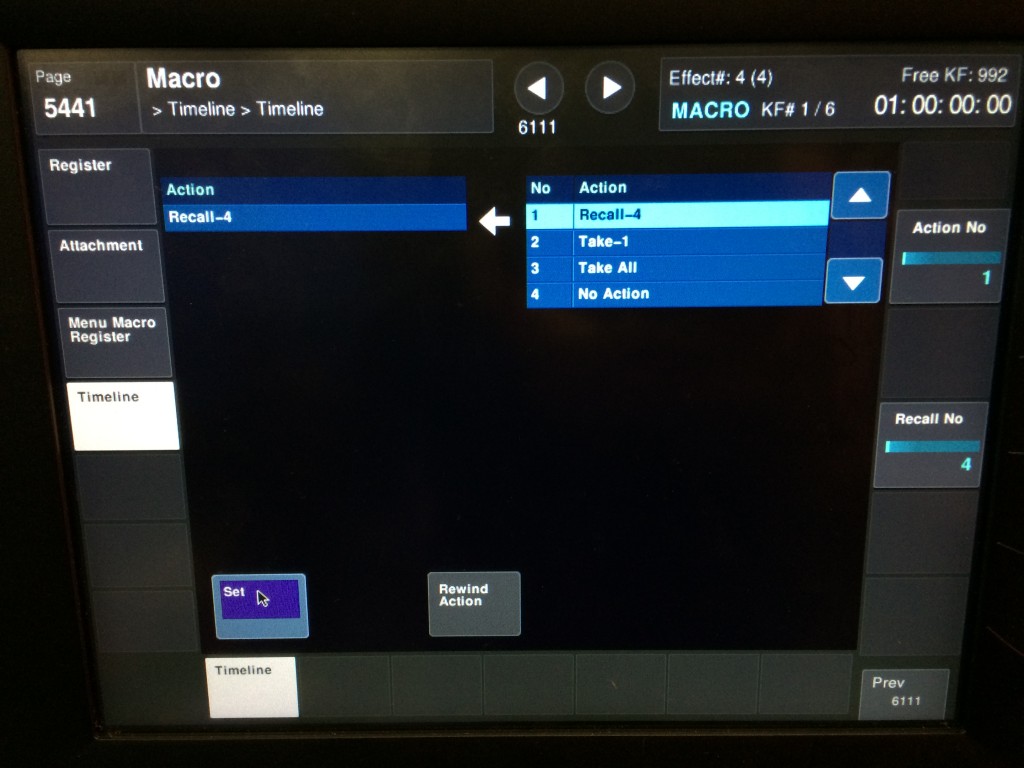 In menu 5441, set the first action that you want to happen in the timeline – i.e. Recall Macro Register 4 (substitute your own macro number here), press ‘Set’.
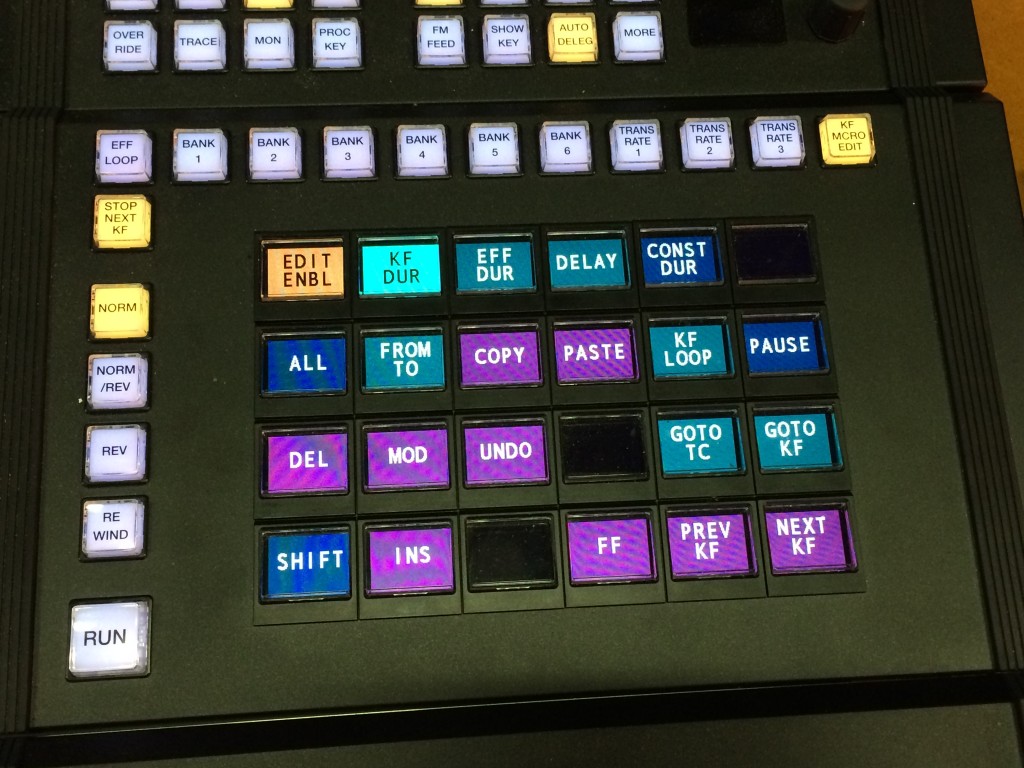
In the effects edit module, check that EDIT ENBL is lit, then press INS to store this data as the first keyframe on the macro timeline. The picture shows the display on an ICP series panel, but the workflow is identical if you’re using the earlier MVS panel.
When you recall & run the macro timeline, it will simply run the macro. In order to make the RUN button function as TAKE you need to insert another keyframe, this time with the action of the TAKE command.
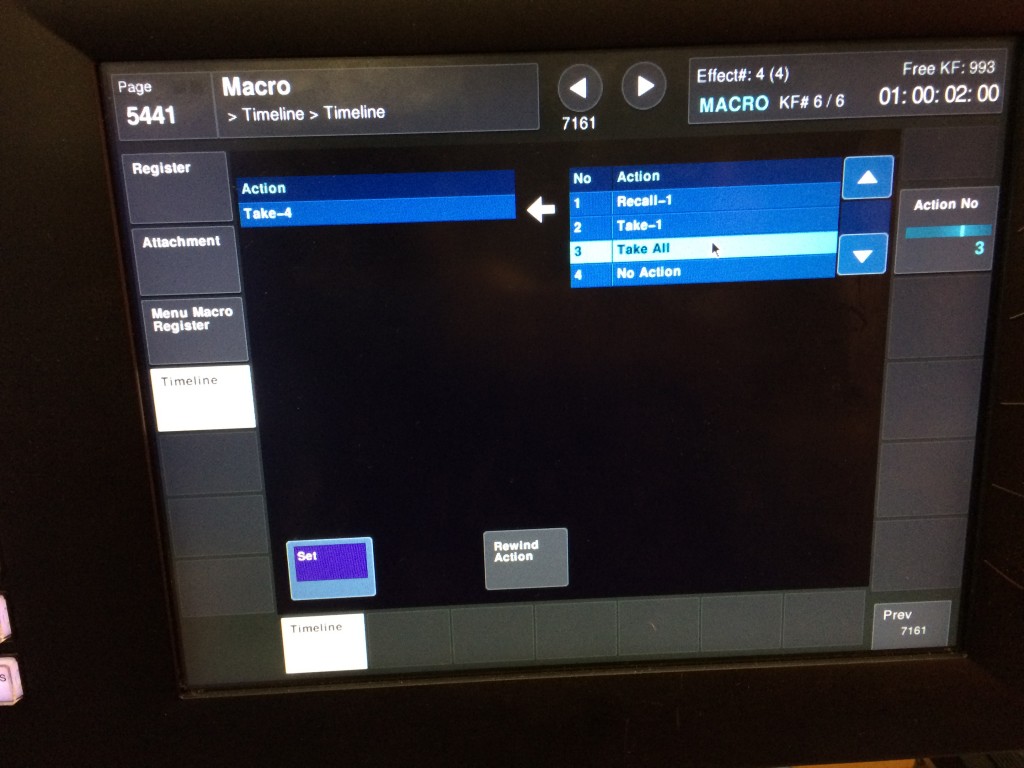
In menu 5441, select ‘Take-4’ to press TAKE only in macro 4, or select ‘Take All’ to press TAKE in all live macro registers. Press ‘Set’, then once again INS to store this keyframe.
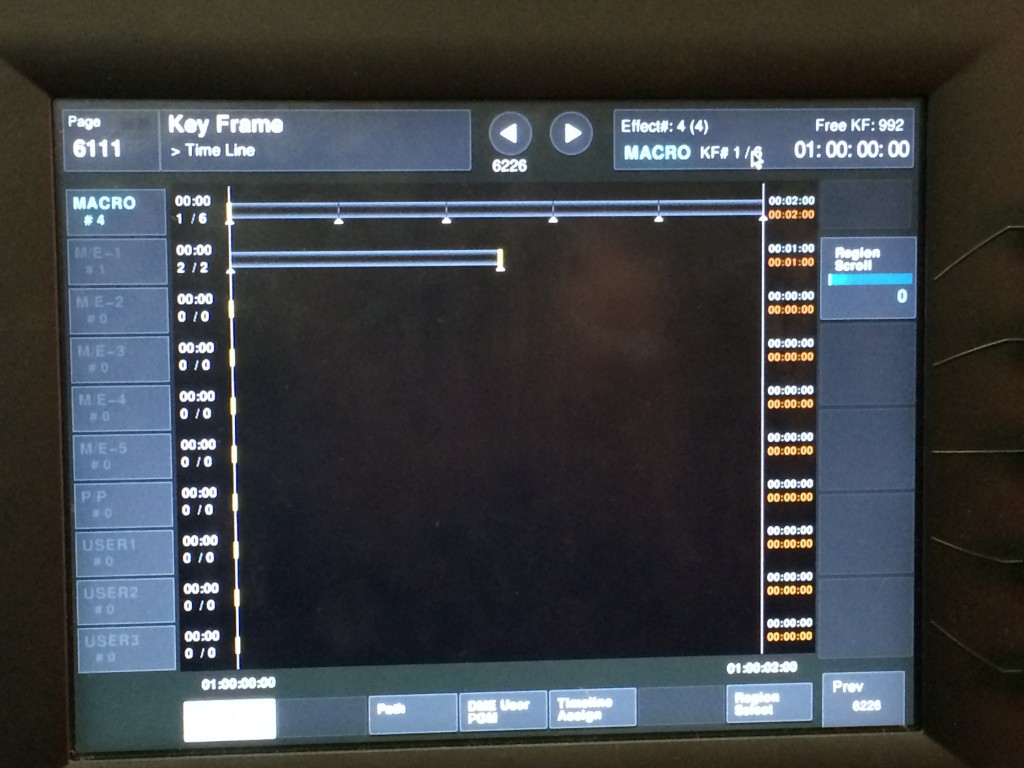
Continue to insert as many keyframes as you need – i.e. if there are 3 PAUSE, ZERO commands in your macro, you’ll need 3 keyframes with the TAKE command to continue after each pause.
Your timeline should now look something like this:
 In the effects edit module, make sure that ‘STOP NEXT KF’ is lit.
Now press EFF>STOR>ENTER to save the timeline into the register.
That’s it! Recall macro effect 4 on the keypad, then hit RUN to start the macro, and RUN again every time you want to continue after a PAUSE, ZERO event. You may need to shorten the keyframe duration in the effect – the default is 25 frames, and if a pause occurs before the next keyframe, the timeline will ignore it. So set a keyframe duration of just a few frames. In my example, I shortened the entire effect duration to 2 seconds as the quickest way to shorten all keyframes.
There’s one more very good reason to use a macro timeline, and that is to run multiple macros concurrently. If you e.g. recall macro1 as keyframe 1, then recall macro 2 as keyframe 2, both macros will run together. Not everyone knows that 😉