This tutorial shows you how to create and save a menu macro, then run it from the flexipad.

Go into menu 5431 and click on an empty menu macro register
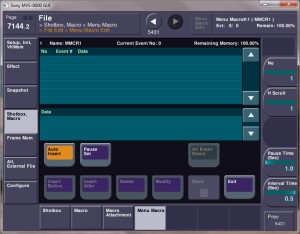
Click the grey button top right – ‘Menu Macro Edit’ to go to page 7144.2. You’ll see an orange button on the left of the menu – ‘Auto Insert’
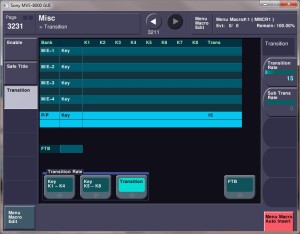
The menu macro is now in record mode, awaiting a menu action. Go to the menu in which you want to change some parameters – in the example below I’ve changed the P/P transition rate to 15 frames, using menu 3231
Notice the pink button bottom right – ‘Menu Macro Auto Insert’, which reminds you that you’re recording the changes you make in the menu.
Now click the green button bottom left – ‘Menu Macro Edit’ to return to page 7144.2. You’ll see a line of data reflecting the changes you made in the transition menu. Now press ‘Store’ – grey button on bottom row – Enter to save the menu macro.
N.B. In some menus the green button bottom left doesn’t appear. In this case click instead on the grey button on the top row, also labelled ‘Menu Macro Edit’. It does the same thing, but it’s harder to find!
You can always run the menu macro from menu 5431, by pressing the blue button ‘Recall & Run’, but it’s much more convenient to run it from the panel, and to do that you need to embed it in a normal macro.
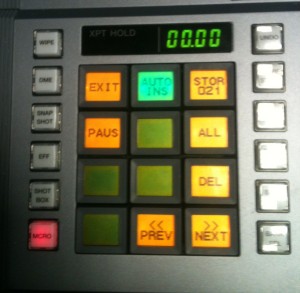
On any flexipad, press & hold the ‘macro’ button whilst selecting an empty register (#21 in the example below), to go into macro record.
Now press ‘Recall & Run’ in menu 5413 – it should still be active on the touchscreen.
Check the display above the flexipad has changed to read ‘01.01’, confirming that the menu macro recall has been stored as a macro event.
Finally, press ‘store’ – top right button in the flexipad. Label the macro, e.g. ’15f tran’, and you now have a custom button that instantly resets the trans rate on the P/P. Of course, you could just as easily make it reset the rates across the whole panel.