This tutorial uses a frame memory snapshot to create a graphics transition, then builds a macro to run the transition with a background cut or mix under the moving graphic.
BANK & KEYER SETUP
I’m using the P/P bank. The key priority is normal – i.e. keyer 1 is the bottom of the stack – priority 4. Keyer 4 is top of the stack – priority 1.
The animation is keyed on DSK3, from Frame Memories 7 & 8 – fill & matte respectively.
I’ve left DSK1 & DSK2 available if I need to transition from or to a composite with graphic.
And DSK4 is available if I need to key a graphic over the top of the replay etc.
FRAME MEMORY SETUP
First, recall the graphics clip into FMs 7 & 8 in menu 2521.
Cut on DSK3, set key3 video source as FM7, check that key is set to linear & autoselect and that FM8 is the key source or matte.
Run the clip in menu 2522 and check which frame you need the background cut to occur on – you can scroll the timeline using the knobs at the right side of the menu GUI.
Firstly, save only the frame memory data as a snapshot.
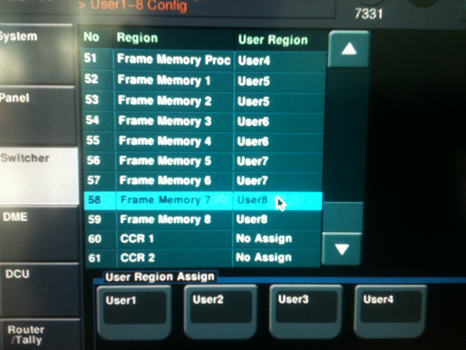
To do this we must save the snapshot for the user group containing FM 7 & 8 data. In the screenshot, this is User Group 8, but it may well be different on your system. Go to menu 7331.4 to check which user group your frame memories are using.
Important – don’t change the FMs to a different user group, or you might destroy previously created snapshots.

Store the snapshot for the appropriate user group, using the main keypad area.
Now we need to add the Clip Event attribute to this snapshot, to tell the switcher to load and run the clip, not just a still frame.
Go to menu 6321 snapshot attribute.
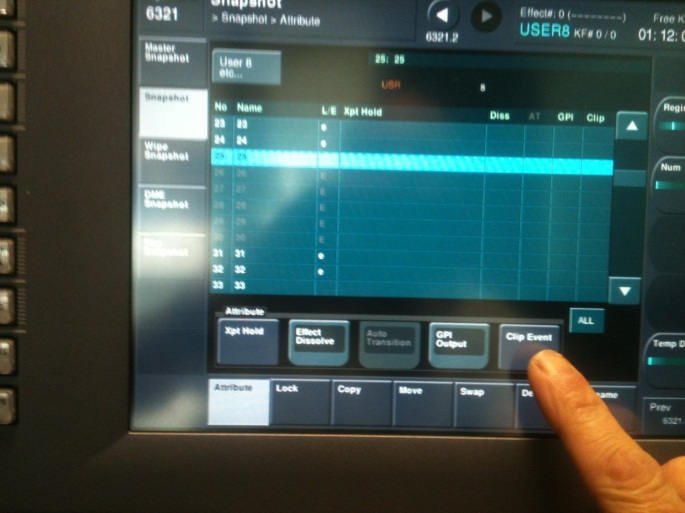
Click the grey button top left and select User 8 (or your user group if different) as the master region in the pop-up – i.e. the User 8 box lights green. Click OK, and check that the top left grey box now reads ‘User 8 etc…’ Select your snapshot and click the Clip Event button to add an attribute to the snapshot.
Note: There’s no need to re-save the snapshot – added attributes are active immediately, and remain until deleted.
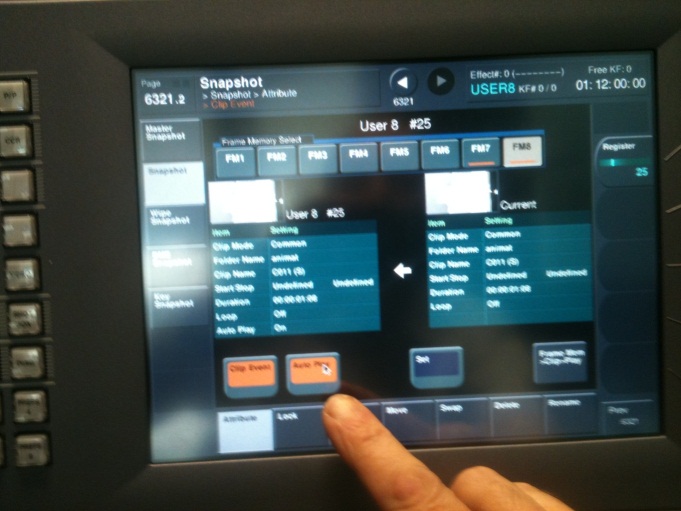 Now you’ll see menu 6321.2. Select FM7; the right-hand pane will show details of the clip. Click Set to add the clip information to the snapshot. The Clip Event button bottom left will turn orange. Click Auto Play to make the clip run immediately on recalling the snapshot. Repeat the above steps for FM8.
BUILDING THE MACRO
Now to build a macro that will run the clip event, together with a background transition that will happen under the graphic.
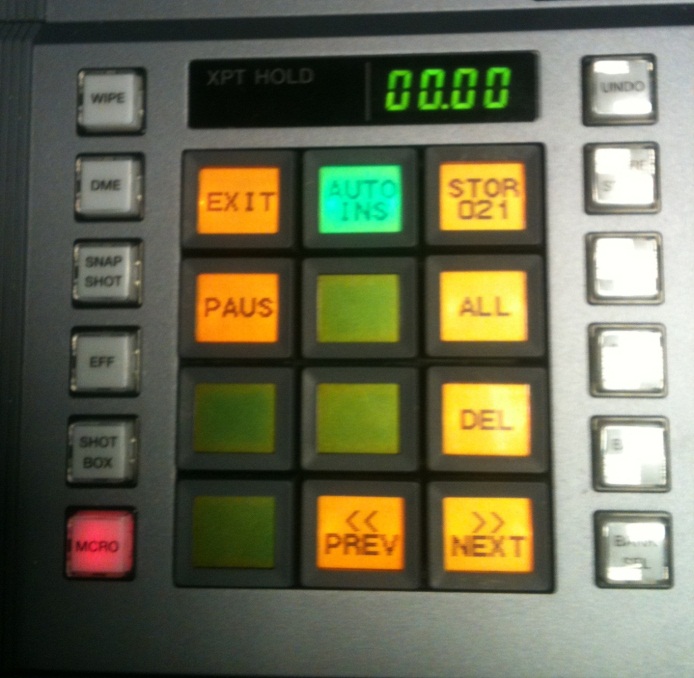
Open an empty macro register using the flexipad – in the screenshot I’ve used macro 21.
Record the following 6 events in the macro:
1. Cut DSK3 on (keys FMs over)
2. Recall your snapshot in User 8 region (loads and runs clip in FM7 & 8)
3. Pause xx frames (waits for the appropriate frame for background transition – see note below)
4. P/P Cut or Auto Tran (does background transition – see note below)
5. Pause 30 frames (waits for the clip to finish – adjust duration as appropriate)
6. Cut DSK3 OFF using the key cut button
Press STOR 021 to save the macro. Each time you run the macro it will do the graphics transition, using whichever background busses you have set for the next transition.
NOTES
In step 3, the pause duration will depend on the graphic. You can scroll the clip in the Frame Memory menu 2522 to find the best place for the background transition. If the graphic comes full frame you can hit the cut button rather than auto trans in macro step 4. If the graphic never completely fills the foreground, or the key signal is never fully white (thank you gfx artist!), do a 3 frame background mix where the graphic is most opaque. This nearly always works visually.
The macro doesn’t set the P/P trans rate or type – it uses whatever is current. You can force the transition rate by editing the macro in offline edit mode.